Processing of SIBU DESIGN panels
For a carefree processing and an optimal final result, you only have to consider a few but very important things! In the following you will find the basic rules, as well as information of individual processing options and tips.
Please note that our product groups are sometimes structured differently and have to be processed partly differently. Therefore, please always inform yourself on the respective product page if a specific processing is possible.
Basic rules

Design panels delivered rolled should be laid flat for at least 24 hours. Additional weighting improves the flatness.

Not recommended for use near an open fire or sources of intense heat.

Mechanical processing such as cutting, sawing, punching or drilling of the design panels is always carried out from the top side of the decor and not from the backside.

Ideal processing temperature + 15 °C to + 30 °C.
The decorative panels must be acclimatized, i.e. brought to room temperature before processing.
This helps to avoid condensation on the adhesive surface and to reduce sheet expansion due to reduced temperature differences.

Most of our products are made of thermoplastics, which expand by approx. 0.7 mm – measured over a length of 1 m – when the temperature increases by 10 °C. That’s why an expansion joint of approx. 2 – 3 mm must be taken into consideration at the sheet edges.
If the ambient temperature is high or the temperature changes considerably, the expansion joint should be bigger or the panel format should be smaller.
Tips for avoiding expansion joints: Seamless design or pressing decorative panels

The substrate must be free of loose parts, dry, smooth, free of dust, dirt, grease, wax and silicone. Depending on whether the substrate is absorbent or non-absorbent, different adhesion options are used.
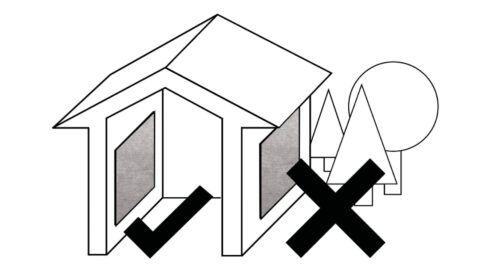
In the case of convex and concave substrates, a mechanical fixing at the edge area is mandatory.

The correct processing depending on the substrate condition:
Absorbent substrate
(e.g. raw MDF, plasterboard,…)
> Bonding with: Glutolin UK, Bostik Ardaflex Multi (Putty adhesive)
> K1-Hybrid-Kleber: Bostik H551 Supergrip Multi, Ramsauer (Cartridge adhesive for strand bonding)
> Pressing decorative panels
Non-absorbent substrate
(eg coated panels, glass, ect.)
> self-adhesive decorative panels
Detect the subsurface:
Simply drip a drop of water onto the substrate – if it does not soak in but remains, it is a non-absorbent substrate.
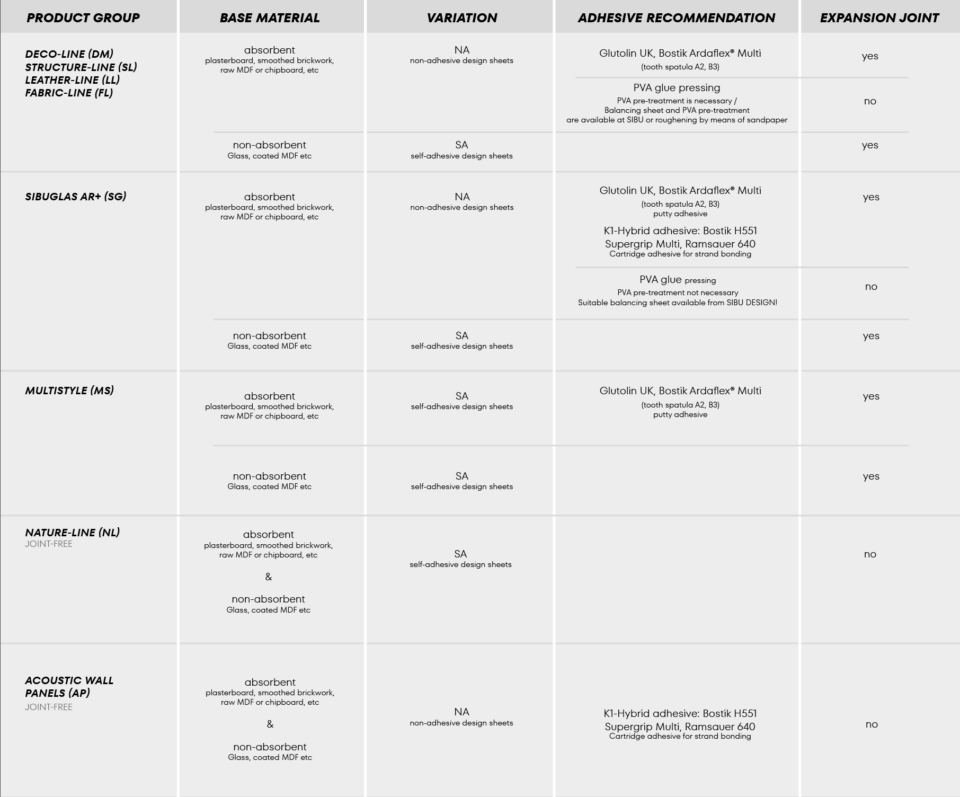
What processing options are offered by each product group
The interactive table is only available on the desktop. Please view this page on a desktop PC.
Product group
Base Material
Variation
Expansion joint
Processing
DECO-LINE (DM)
STRUCTURE-LINE (SL)
LEATHER-LINE (LL)
FABRIC-LINE (FL)
absorbent
plasterboard, smoothed brickwork, raw MDF or chipboard etc.
NA
non-adhesive design sheets
Glutolin UK, Bostik Ardaflex® Multi (tooth spatula A2, B3)
putty adhesive
PVA Glue Pressing
PVA pre-treatment is necessary. Balancing sheet and PVA pre-treatment are avaliable at SIBU or roughering by means of sandpaper
non-absorbent
Glass, coated MDF, etc.
SA
self-adhesive design sheets
SIBUGLAS AR+ (SG)
absorbent
plasterboard, smoothed brickwork, raw MDF or chipboard etc.
NA
non-adhesive design sheets
Glutolin UK, Bostik Ardaflex® Multi (tooth spatula A2, B3)
putty adhesive
K1-Hybrid adhesive: Bostik H551 Supergrip Multi, Ramsauer 640
cartridge adhesive for strand bonding
PVA Glue Pressing
PVA pre-treatment is not necessary. Balancing sheets are avaliable at SIBU
non-absorbent
Glass, coated MDF, etc.
SA
self-adhesive design sheets
MULTISTYLE
absorbent
plasterboard, smoothed brickwork, raw MDF or chipboard etc.
SA
self-adhesive design sheets
Glutolin UK, Bostik Ardaflex® Multi (tooth spatula A2, B3)
putty adhesive
non-absorbent
Glass, coated MDF, etc.
SA
self-adhesive design sheets
NATURE-LINE (NL)
absorbent
plasterboard, smoothed brickwork, raw MDF or chipboard etc.
&
non-absorbent
Glass, coated MDF, etc.
SA
self-adhesive design sheets
ACOUSTIC WALL PANELS (AP)
absorbent
plasterboard, smoothed brickwork, raw MDF or chipboard etc.
&
non-absorbent
Glass, coated MDF, etc.
NA
non-adhesive design sheets
K1-Hybrid adhesive: Bostik H551 Supergrip Multi, Ramsauer 640
cartridge adhesive for strand bonding
Consider the technical table on the product page
Once you have decided on a product in the product overview, click on it to get all the information about the product.
Further down on the product page you will also find the actual technical product spreadsheet. There you will find the information whether a certain processing step is permitted.
Mechanical processing

Mechanical processing:
All mechanical processing must always be done from the decor surface.
Please refer to the technical spreasheet of the selected product to ensure that the processing step is permitted for this product.

Cutting:
A majority of our decorative panels are easy to cut with a wallpaper knife. Simply scarve the surface (decor side) and break over the edge. For self-adhesive products (SA), the adhesive or foil must be cut through after breaking over the edge on the reverse side. Please always use good-cutting knives.
For machine cutting, we recommend to use paper or veneer cutting machines.

Sawing: (SIBU DESIGN guidlines)
Up to 1 mm material thickness: HW 280×3,2 / 2,2×30 Z60 / 12,46-18,08 WZ
Thicker than 1 mm: HW 250×3,2 / 2,2×30 Z40 / 19,63 WZ/FA – HW 250×3,2 / 2,2×30 Z40 / 19,63 FZ/TR (speed 6000 rpm, feed up to 25 m/min).
For LEATHER-LINE and FABRIC-LINE: HW 255×2,8 / 2,0×30 Z80 / 10,01 FZ WZ (speed 6000 rpm, feed up to 10 m/min). The best result is achieved with MDF allowance (4 mm) at the bottom and top, low feed and high speed.
*HW (carbide material), WZ/FA (alternate tooth chamfer), FZ (flat tooth), TR (trapezoid tooth).
For SIBUGLAS and OPACO-LINE:
Sheets can be cut with jig, hand-held circular, panel and circular table saws. More detailed information can be found here.

Lasering:
SIBU DESIGN sheets can be processed with standard lasers.
The cutting speed depends on the wattage of the laser.
Whether the selected product is suitable, you will find in the technical spreadsheet with the respective product.

Milling:
Up to 2 mm material thickness:
Milling cutter 3 mm diameter, speed 12000 to 24000, feed up to 12 m/min.
– Decorative top side: Milling cutter twisted on left, cutting on right.
– Decor bottom side: Milling cutter twisted on the right, cutting on the right.
For materials over 2 mm, use less feed and a cutter with a larger diameter (6 mm).
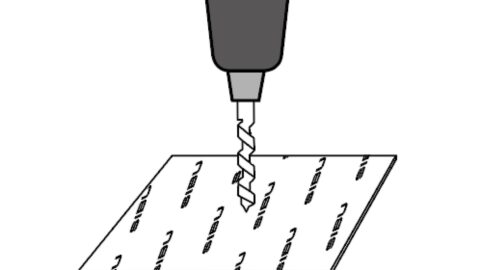
Drilling:
All SIBU DESIGN panels can be drilled from the decor side.
Only drill with a stable support. Drill recommendation: Wood drills, Forstner drills and hard metal drills – each with a center punch with two pre-cutters.
Crown drills for wood or hole saws (BI metal) can also be used. Fix the design sheet to a stable base.
Step by step guide of the different processing possibilities
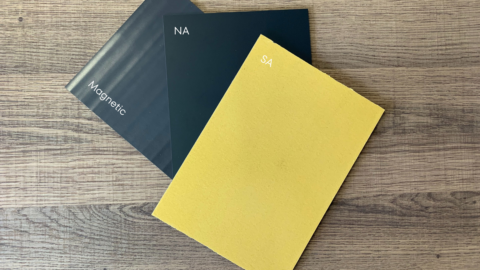
Equipment of the back of the decorative panel:
Non-adhesive (NA), self-adhesive (SA) or magnetic. We offer the right finish for every application area to optimally support your realisations.
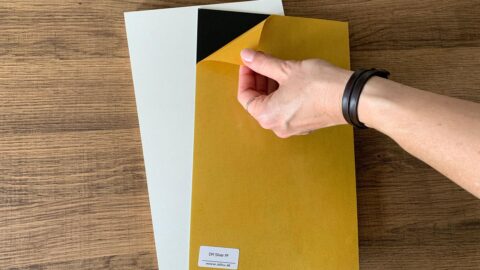
Bonding self-adhesive decorative panels
Learn here how to glue self-adhesive design sheets and how to prepare substrates correctly.

Pressing with PVA glue or PUR adhesive
To make a composite board from a non-adhesive decorative panel (NA) with material thicknesses of 1-4 mm, the design sheet must be pressed. In this article you will find out all the steps you need to consider.

Processing of SIBUGLAS & OPACO-LINE
Find out here everything you need to know about the processing of these two product groups
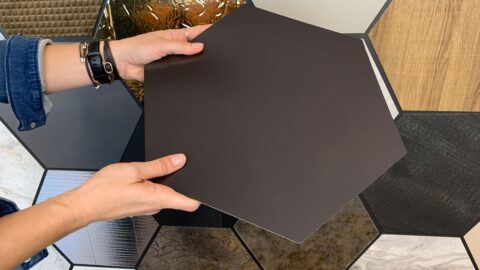
Magnetic decorative panels
In this article you will learn everything about the magnetic equipment of the decorative panel, suitable substrates as well as installation.

Individualise through printing
Whether logo or special patterns – even more individual effects can be achieved by printing using a screen or digital printing process.

Punching
Punching elements such as stars, leaves but also logos can be perfectly realised with punching tools. We will be happy to do this for you.

Seamless wall cladding
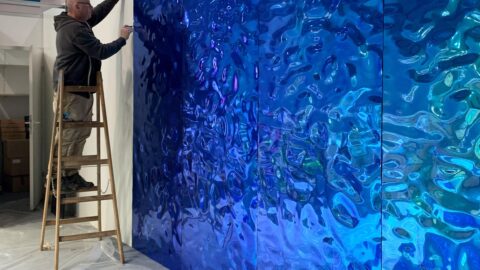
Learn here which products you can use to desig large surfaces without joints.
