Processing of SIBUGLAS & OPACO-LINE
The decors of the SIBUGLAS & OPACO-LINE product groups distinguish significantly from the other product groups in the product structure and must therefore also be processed slightly differently. In this article you will get to know what you need to consider when processing and installing the decorative panels.

Collage verschiedener SIBUGLAS MARBLE Dekore
Product structure
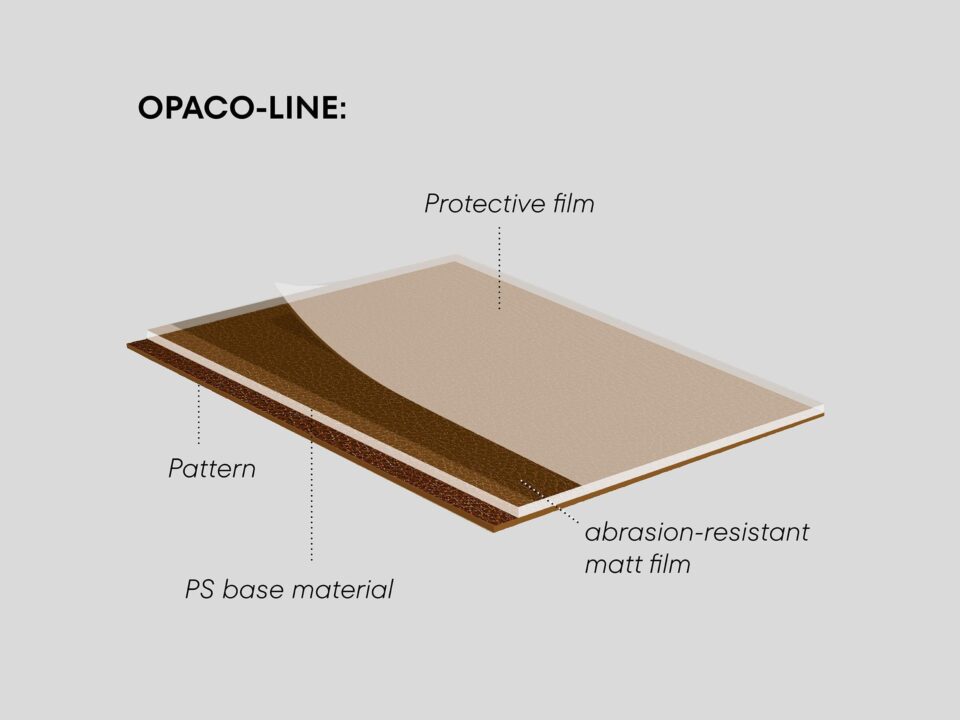
Compared to most of the product groups, the item in the SIBUGLAS ( SG) and OPACO-LINE (OL) product groups are made of a thicker backing material. SIBUGLAS uses 1.8 mm thick transparent PMMA and OPACO-LINE uses a 2 mm transparent PS.

Golden Rules
- Processing basically on the patterned side (for this reason jig- and hand-held circular saw cuttings must take place from the reverse side).
- Design sheets can be cut with jig, hand-held circular, sizing/table circular saws.
- During cutting: saw along an underlay on the backside. Then trimm all cutting edges.
- Absolutely avoid fluttering of the decorative panel during all work steps.
- Always place the design sheet flat and fix the panel if necessary.
- Speed and feed should be adapted to the saw blade.
- Use sharp cutting tools!
- Heat development should be constantly avoided, as this can cause tension in the material.
Mechanical processing of the patterned sheets prior to adhesive application

Cutting by hand-held or plunge circular saw
Cut from the reverse side and use a stable underlay. Recommended saw blade: 160×2.2 hard metal blade with 48 alternate teeth.

Cutting by jigsaw
Set the pendulum stroke to zero, or max. to 1 and then saw from the backside. The design sheet must lie fully on the jigsaw cutting table in order to ensure that no vibrations are created.
Recommended saw blade: saw blades with tooth distance of 1.2 to max. 2.5 mm. (coarse metal saw blade / fine wood saw blade / preferably PMMA saw blades).

Drilling
All drillings must be done on a stable underlay.
Recommended drills: Wood drills, Forstner drills and hard metal drills – each with a center punch with two pre-cutters. Crown drills for wood or hole saws (BI-metal) can also be used. Fix the design sheet on a stable subsurface.

Laser Cutting
Design sheets can be processed with standard lasers. The cutting speed depends on the laser wattage.
Note: Place the decorative panel on the laser machine so that its reverse side is on the machine’s vaccuming side. As with all standard PMMA products, it is recommended to “temper” the material after laser cutting. The high temperature of the laser causes
tension in the material, which could cause tension cracks. Tempering equalises these tensions.
Ground and Bonding
The surface free from loose material, dry, smooth and free of dust, dirt, grease, wax and silicone. SIBU decorative sheets should never be mounted onto an uneven surface, as this will results in a loss of visual quality.
In the case of convex and concave surfaces, the sheet edges must be fixed mechanically.
Non-absorbent surfaces:
In order to achieve maximum adhesion, always clean non-absorbent surfaces with alcohol (ethanol, isopropyl alcohol). Self-adhesive (SA) sheets are suitable for non-absorbent surfaces such as coated MDF/chipboard, glass, metal, plastic, etc. Self-adhesive (SA) design sheets are not suitable for ceiling applications. Alternative processing options are available on request.
Tip: Read our blog post: Bonding self-adhesive decorative panels to non-absorbent surfaces
Absorbent surfaces:
A solvent-free adhesive, which is suitable for both the substrate and the polystyrene, must be used for absorbent surfaces, e.g. uncoated chipboard, MDF, plasterboard, or smoothed brickwork.
Tip: Read our blog post: SIBU DESIGN Adhesive recommendations
The decorative panels can also be pressed onto absorbent substrates using PVA (white glue). Tip: Read our blog post: Pressing SIBU PANELS with white glue.
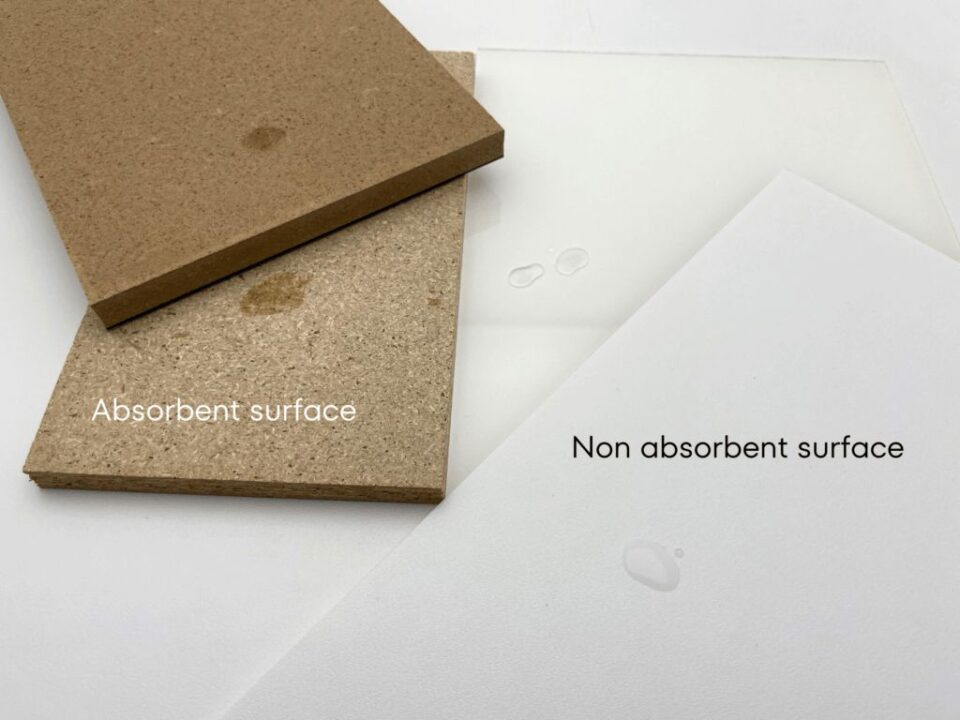
Left: absorbent substrates & right: non-absorbent substrates
Bonding & Pointing
Another possibility to bond SIBUGLAS & OPACO-LINE products is a bead bonding.
Bead bonding:
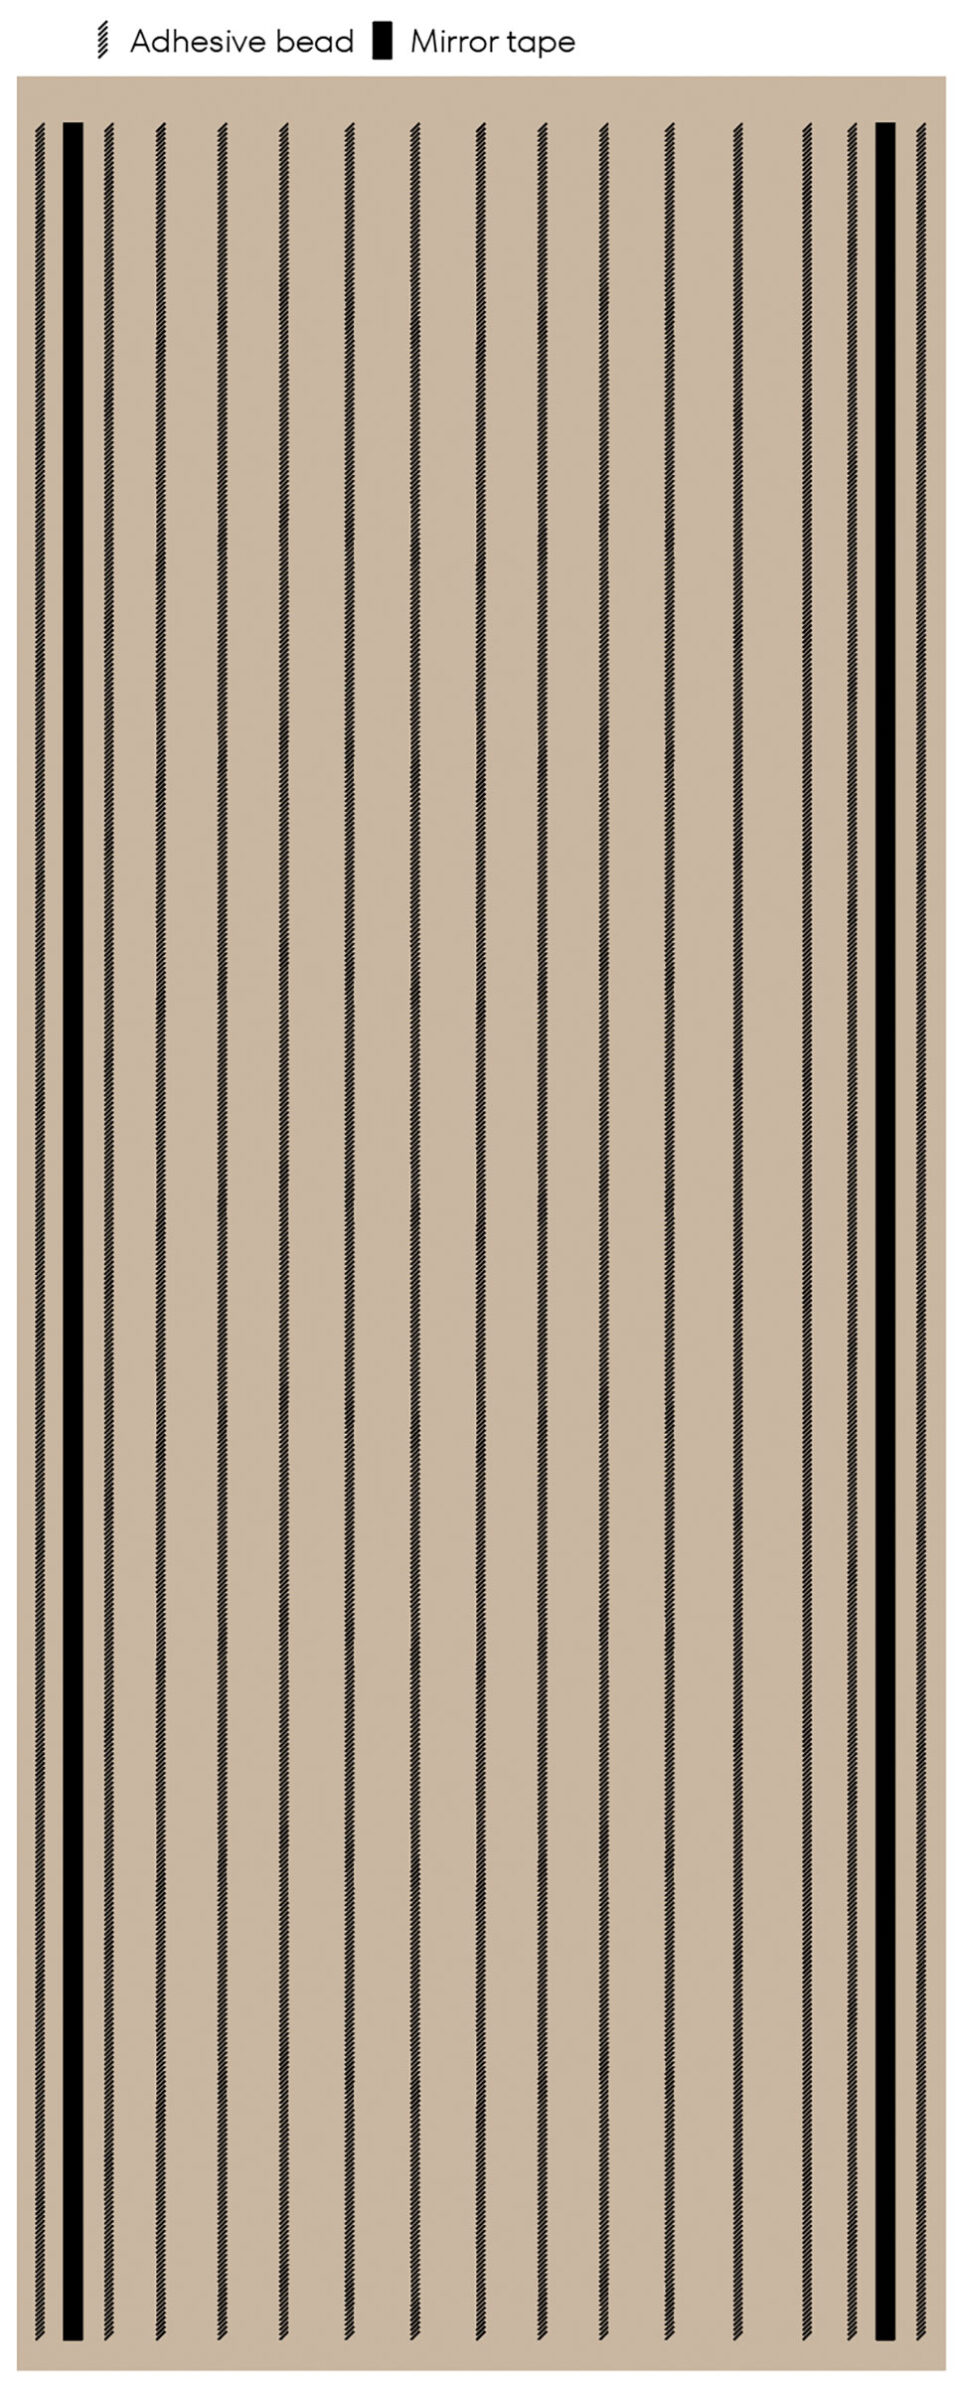
On the reverse side of the sheet: vertical positioning of a bead at a distance of 10 mm from the edge of the sheet or the profile leg, then position a mirrored adhesive tape at a distance of 10 mm.
It is recommended to remove the cover of the mirror adhesive tape before further processing steps. Apply vertical glue beads with intervals of approx. 10 mm to the mirrored adhesive tape. (Depending on the surface, the beads should have a height of at least 4 mm.) Apply the other beads at a distance of 60 mm.
Bring the sheet into position without any drying time and then press it vertically onto the prepared surface with a soft wallpaper roller.
Carry out adhesion tests and self-tests before bonding the panels!
The gluing can also be done without mirror adhesive tape!
Advantage: The sheet can be positioned much easier.
Disadvantage: The sheet has to be temporarily fixed until the beads have dried in order to prevent the sheet from unwanted slippage.
Once the adhesive has hardened, the joints can be sealed with silicone.
Immediately remove the protective film from the sheet and any possible glue leftovers.
Bonding self adhesive sheets onto coated wood based sheets including edges and milling
This method is an alternative to pressing!
MATERIAL REQUIREMENTS
SIBU DESIGN decorative sheet: SA in size: 2600 x 1000 mm, self-adhesive
Wood support panel: Wood based sheet coated on both sides, dimensions: 2600 x 1000 mm
Balancing sheet: Not required!
Edge material: All standard furniture edges
PROCESSING STEPS
- Clean the coated wood sheet.
- Remove the adhesive cover of the design sheet.
- Glue the design sheet onto the wood base sheet with the help of a rubber roller.
- Immediately cut the bonded sheets into the desired final dimensions (saw cut).
- Apply the edges on the edge banding machine.
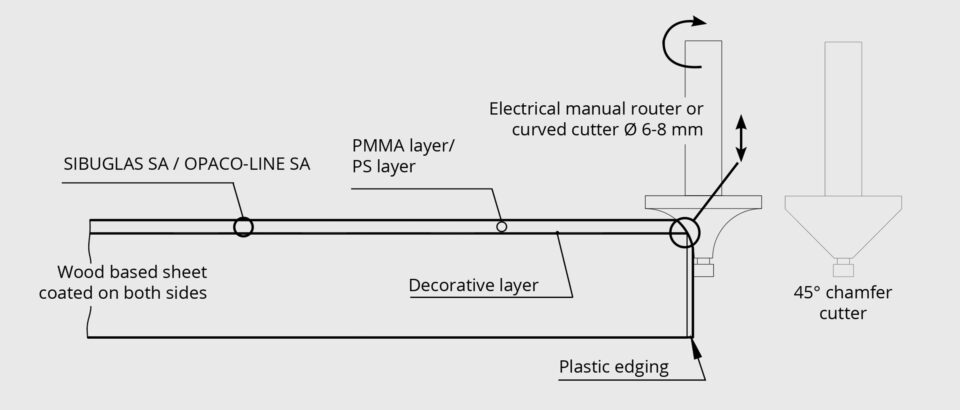
- Use an electrical manual router, mill off a rounded or chamfered edge exactly up to the point of transition from the transparent PMMA layer/PS layer to the design layer. Please see sketch! In combination, the edge material and the transparent PMMA layer/PS layer give the resulting radius or chamfer. The thicker the edge material, the wider the facet.

SA Edge with SG GENESIS
